Integration Guide: BlockAuth SDK for React
This guide will help you set up your Block-Auth environment and prepare your applications for integration.
Prerequisites
Before you begin, ensure you meet the following requirements. It is essential to complete the registration process in the Browser Extension and Dashboard quickstart guides before proceeding with this integration.
- A functional React project with a login system.
- A BlockAuth account created via the browser extension. You can refer to the registration section of the Browser Extension Quickstart.
- Registration on the Dashboard. You can refer to the registration section of the Dashboard Quickstart.
- Once you have met the above requirements, continue with the steps below to complete your integration.
1. Create a tenant
In the Block-Auth ecosystem, a Tenant (also referred to as a Workspace) is a top-level organizational unit. It acts as a secure container for your applications, team members, and configuration settings. By using tenants, you can isolate different projects or clients within the same dashboard account.
1.1 Define your Tenant Name
Enter a descriptive name for your workspace. This name will help you identify the environment across the dashboard and in your API configurations.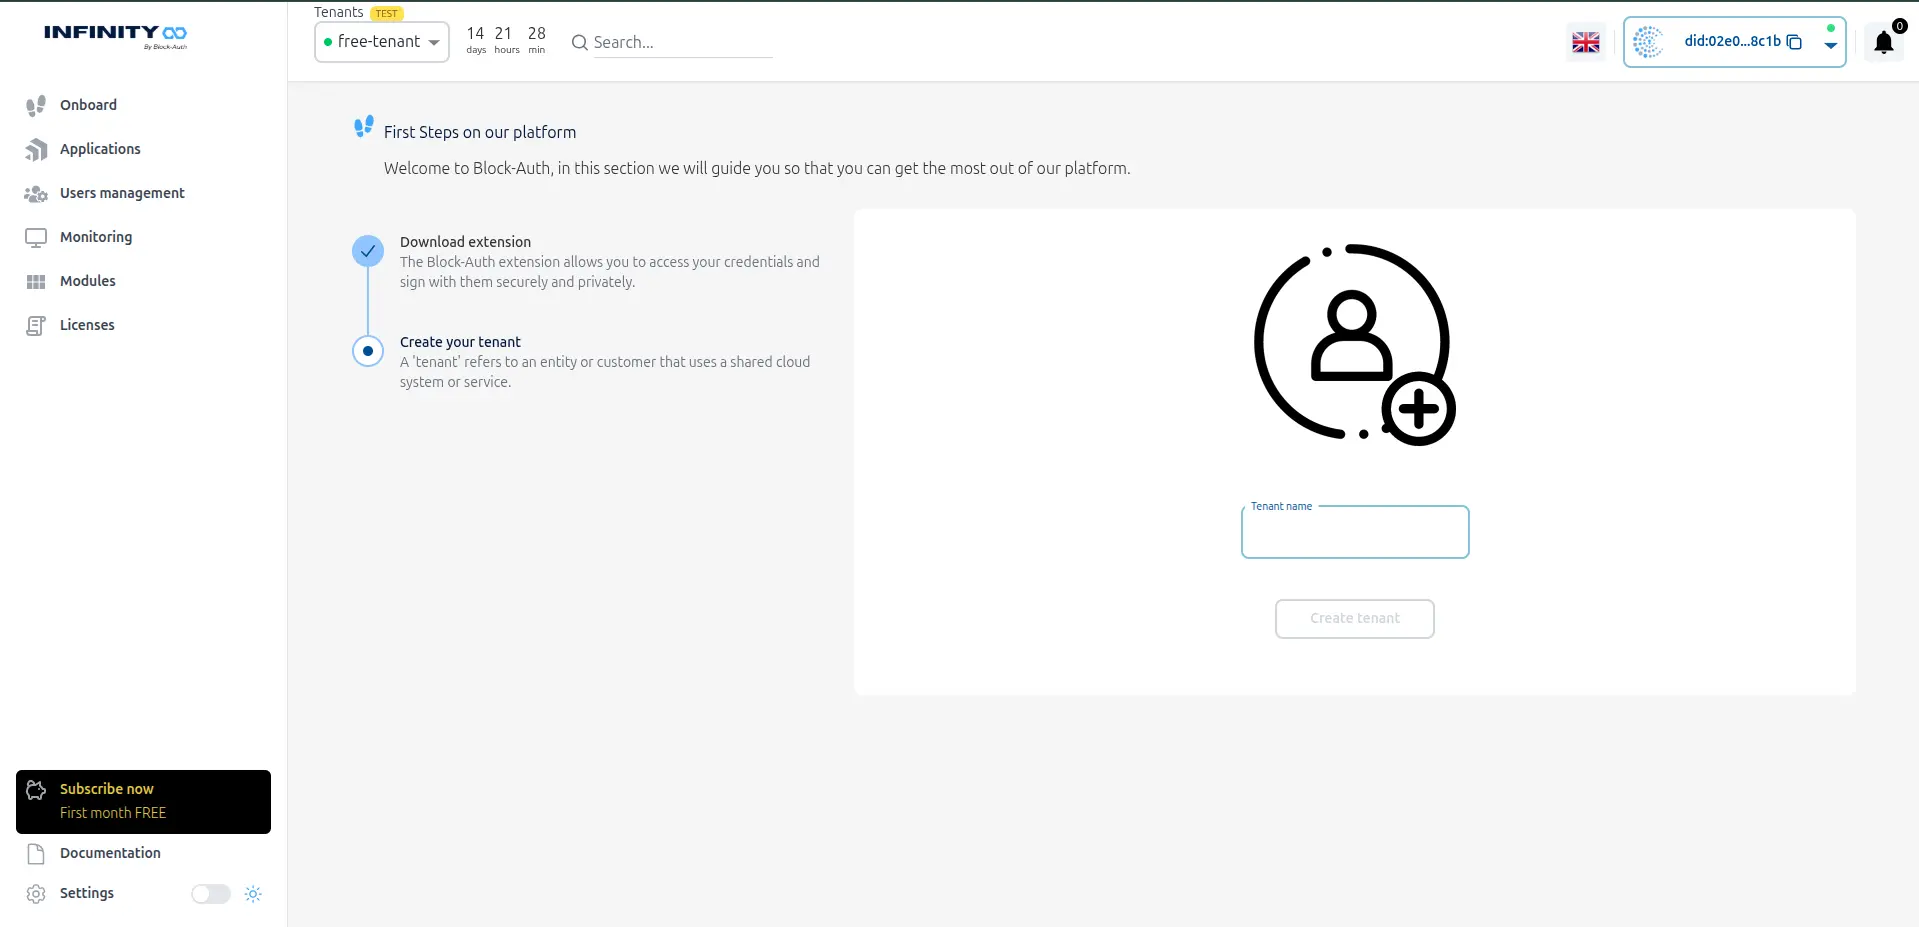
1.2 Confirm Creation
Once you have named your tenant, click the "Create" button. The system will initialize the environment and set up the necessary infrastructure for your applications.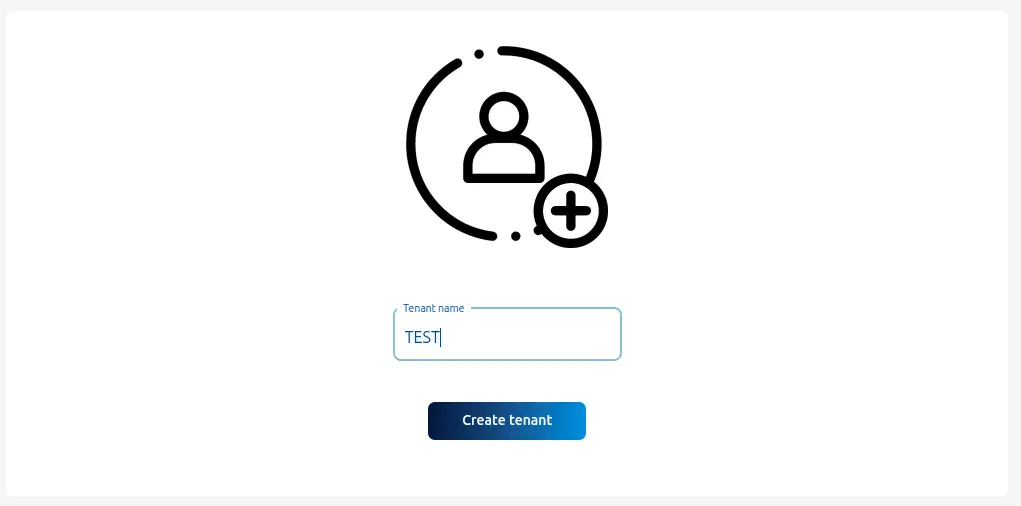
1.3 Tenant Overview
After creation, you will be directed to the tenant list. From here, you can see all your active workspaces, switch between them, and access their specific project settings.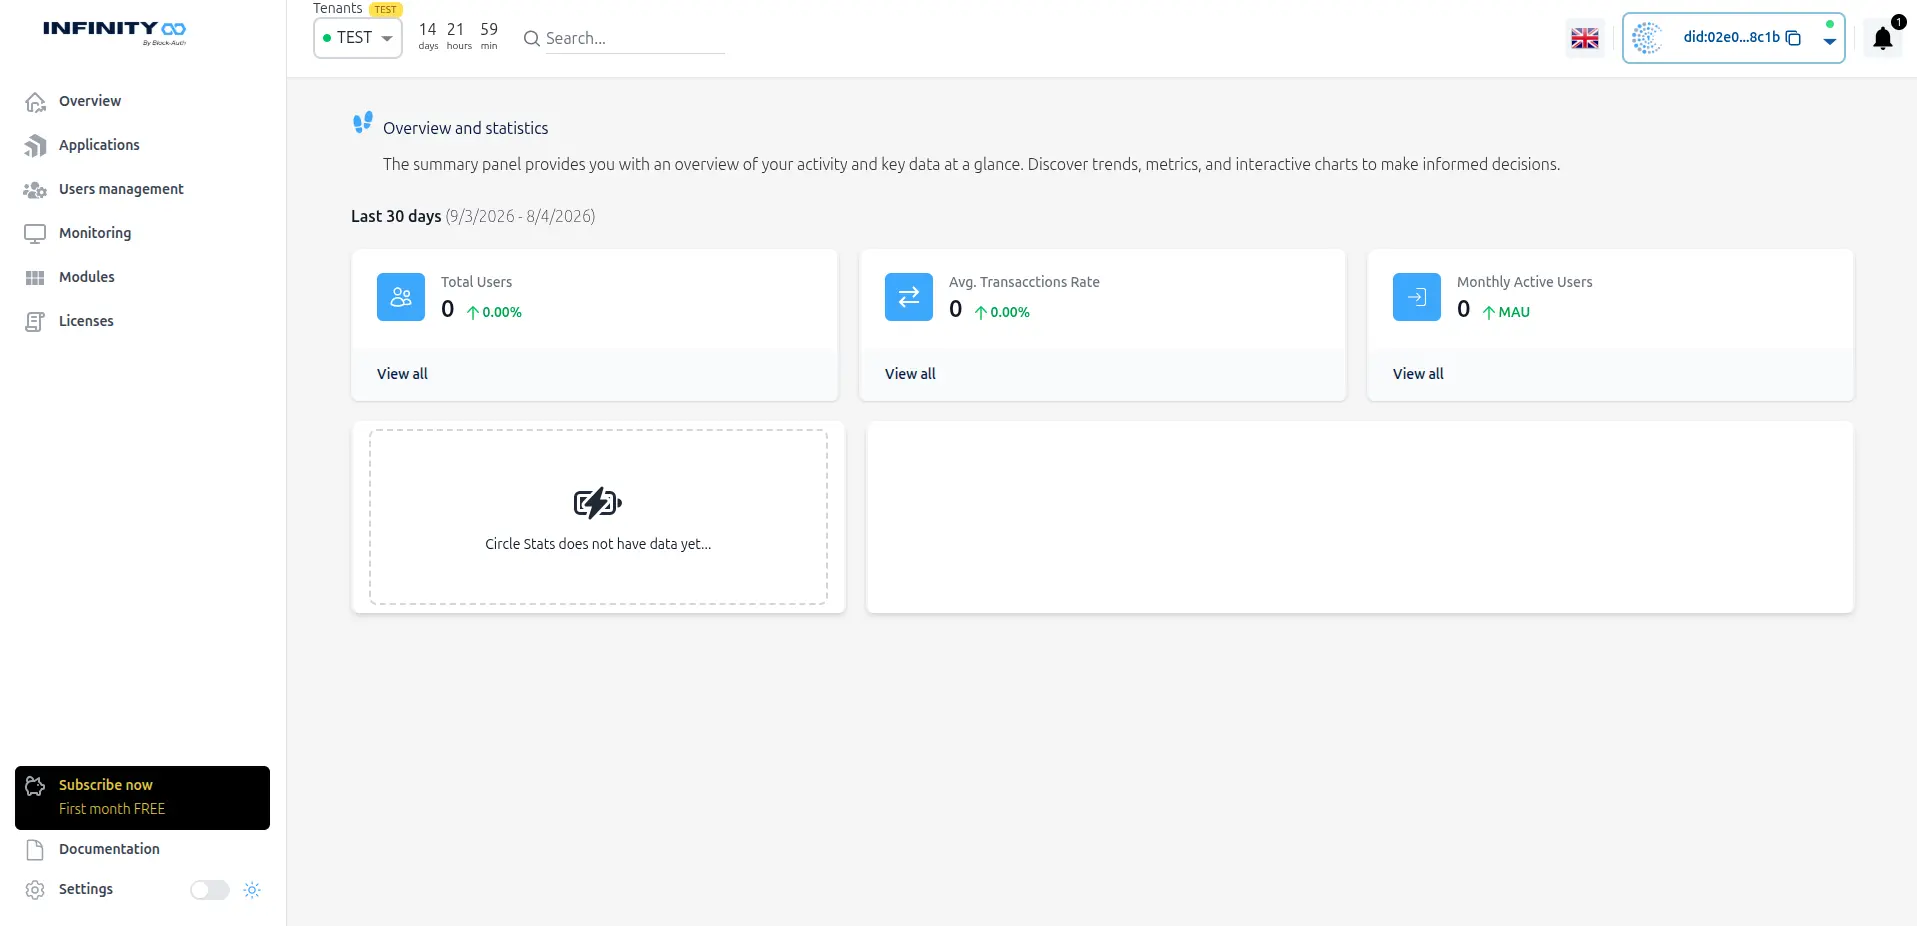
2. Link your application
After initializing your tenant, the next step is to link your specific applications to the Block-Auth ecosystem. Each application represents a unique integration with its own set of rules, permissions, and authentication flows.
2.1 Navigate to the Applications Section
Within your active tenant, locate the "Applications" tab in the sidebar menu. This section is where you manage all your project integrations.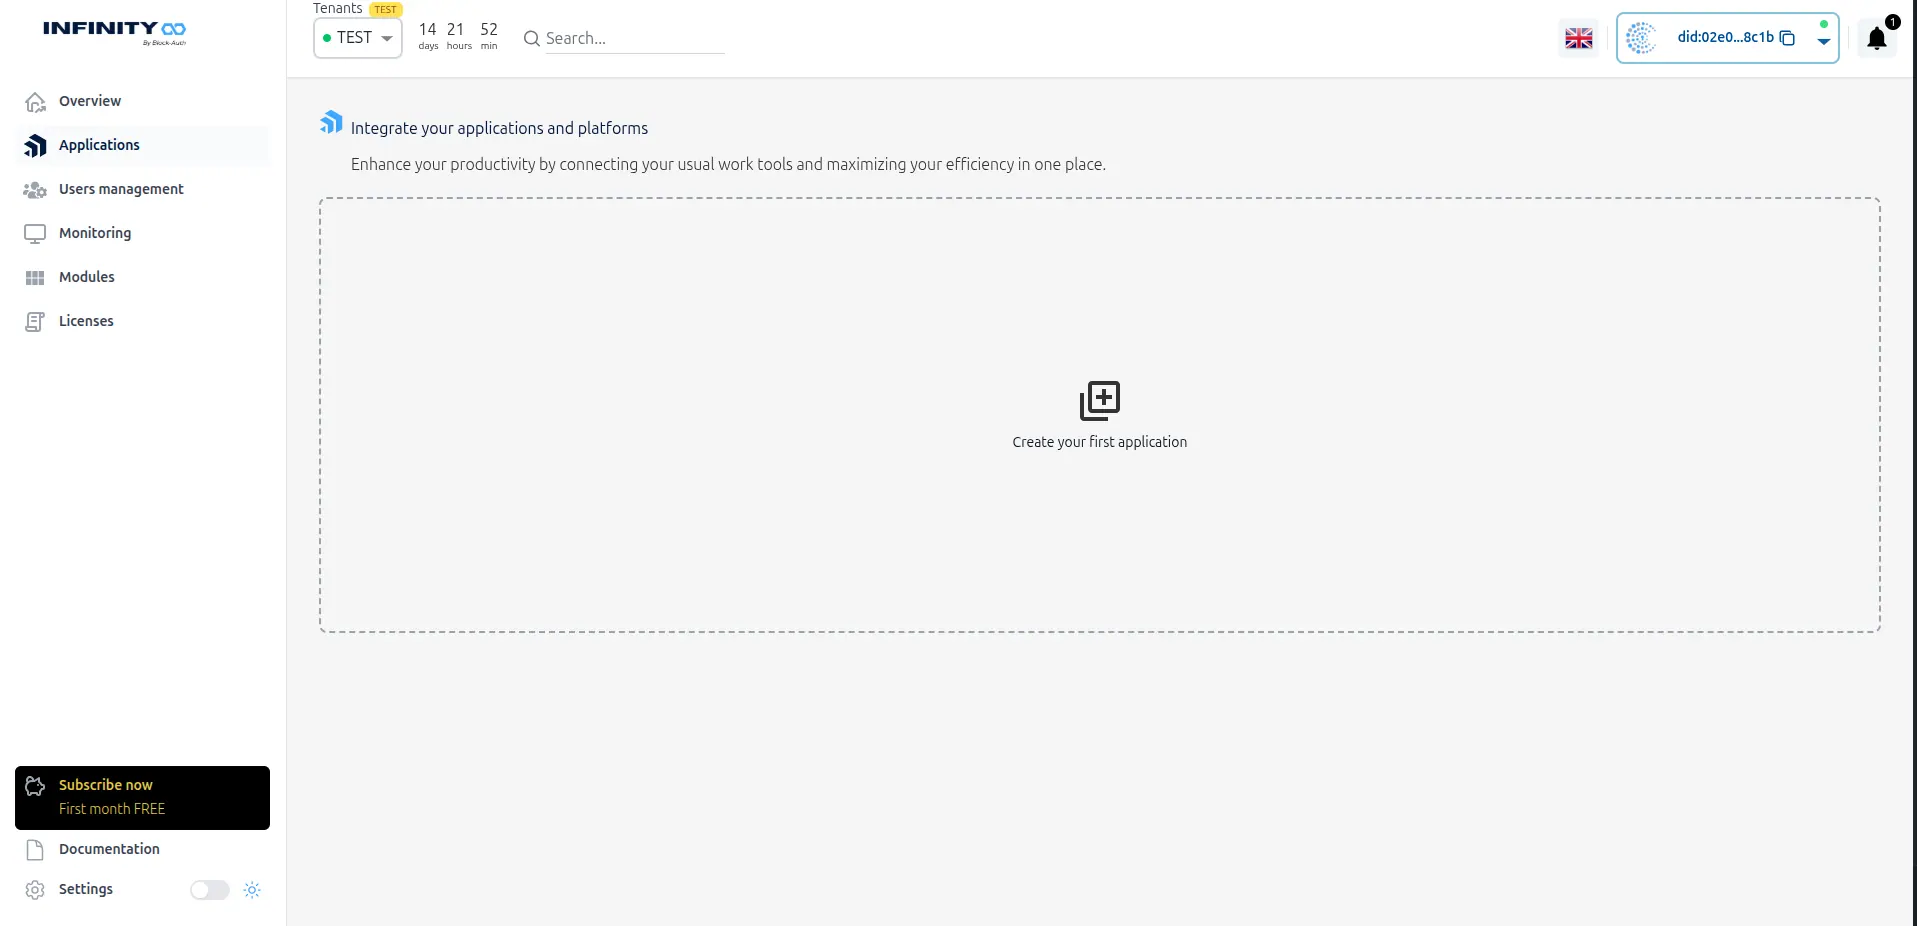
2.2 Provide Application Details
Enter the required information for your application, such as the name, domain, and specific configuration settings. Use the fields to define how Block-Auth will interact with your system. Note: The domain must be "clean"—enter only the host name (e.g.,example.com) without the https:// protocol or trailing slashes. The application name can be any valid label you want in the dashboard; it does not depend on DNS, verification tokens, or any other technical validation.
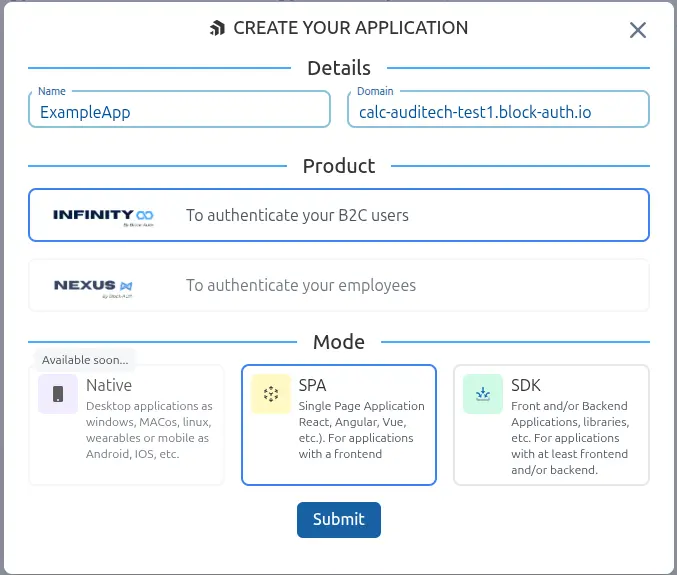
Once completed, you will see the following screen:
2.3 Validate and Complete Application Link
To finalize the connection, click on the "Validate your domain" button. This will display the verification process required to confirm ownership of your domain.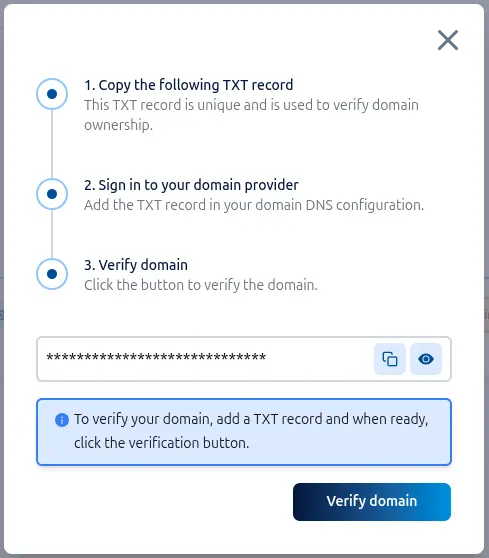
Follow the instructions to copy the unique TXT record and add it to your domain's DNS configuration.
2.4 CloudFlare exapmle
Open the Cloudflare dashboard for your domain, then go to DNS in the left sidebar and select Records.

On this screen, find the "Add record" button and click it to add your TXT record.
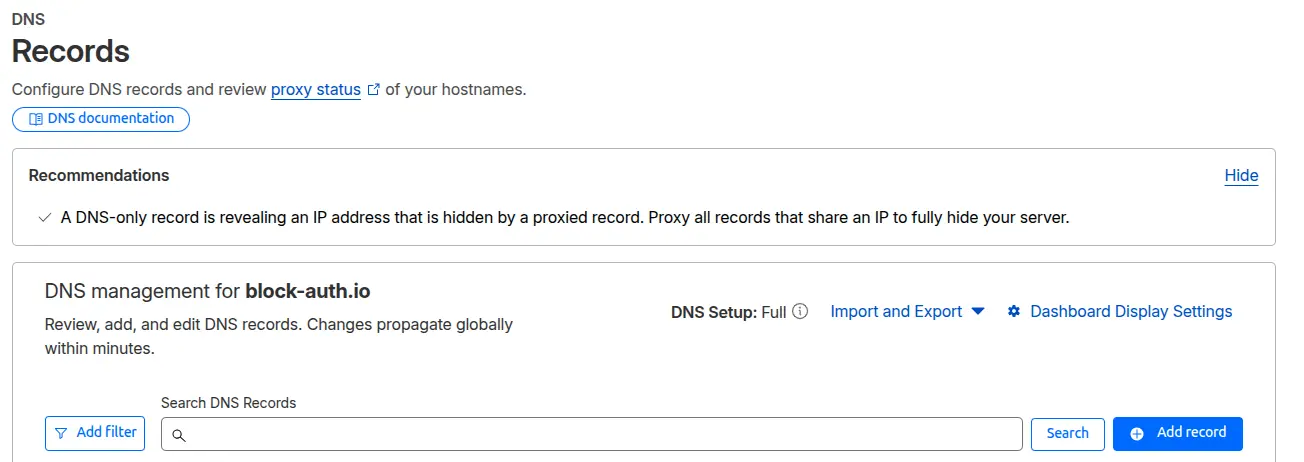
Create the DNS record as follows:
- Select
TXTas the record type. - In
Name, enter your domain as shown in the example below. - In
Content, paste the verification token exactly as copied from the dashboard.
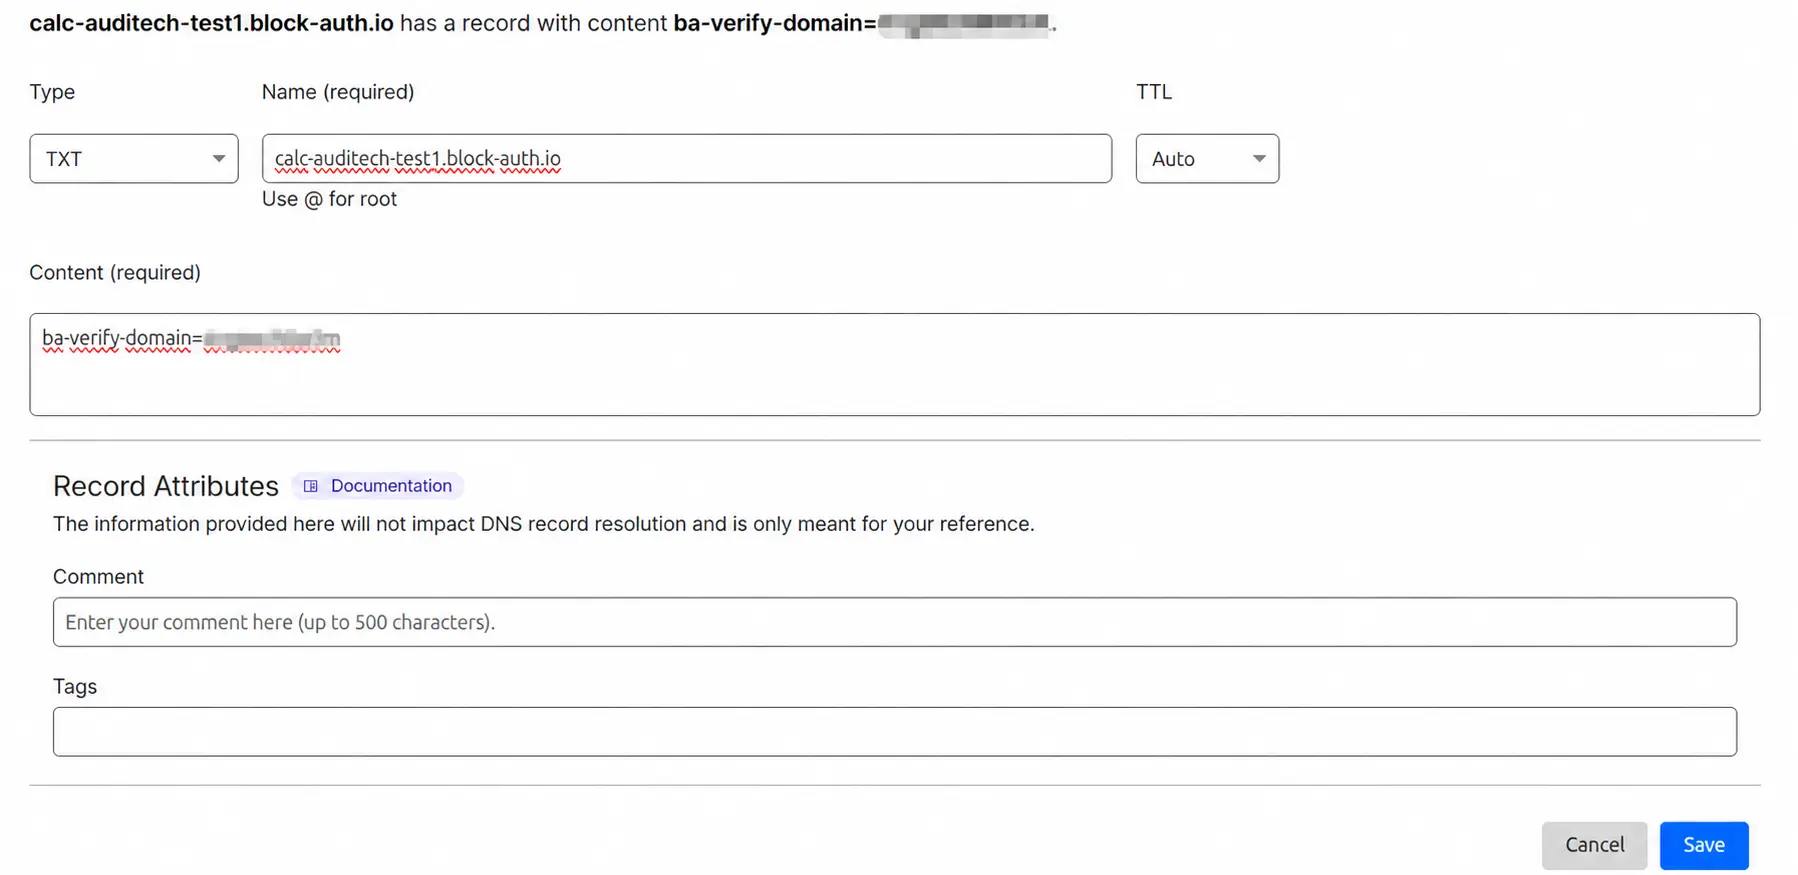
Click the Save button to create the record.
After saving, wait for DNS propagation before verifying the domain (this is a good time to grab a coffee). In most cases this takes 1 to 5 minutes. In some situations it may take longer (up to 1 hour, and in rare cases up to 24 hours).
If you use a different DNS provider, complete the equivalent TXT record process in that platform.
Return to the dashboard to verify your domain.
Important matching rule
- Use the same host in DNS that you entered in the app Domain field.
Set TXT Name to that host:
- If your domain is root (for example
example.com), Cloudflare may show it as@orexample.com(both are equivalent). - If your domain is a subdomain (for example
app.example.com), use that subdomain host (for exampleapporapp.example.com, depending on your DNS UI).
- If your domain is root (for example
- Set TXT Content to the exact verification token shown by Block-Auth (no changes).
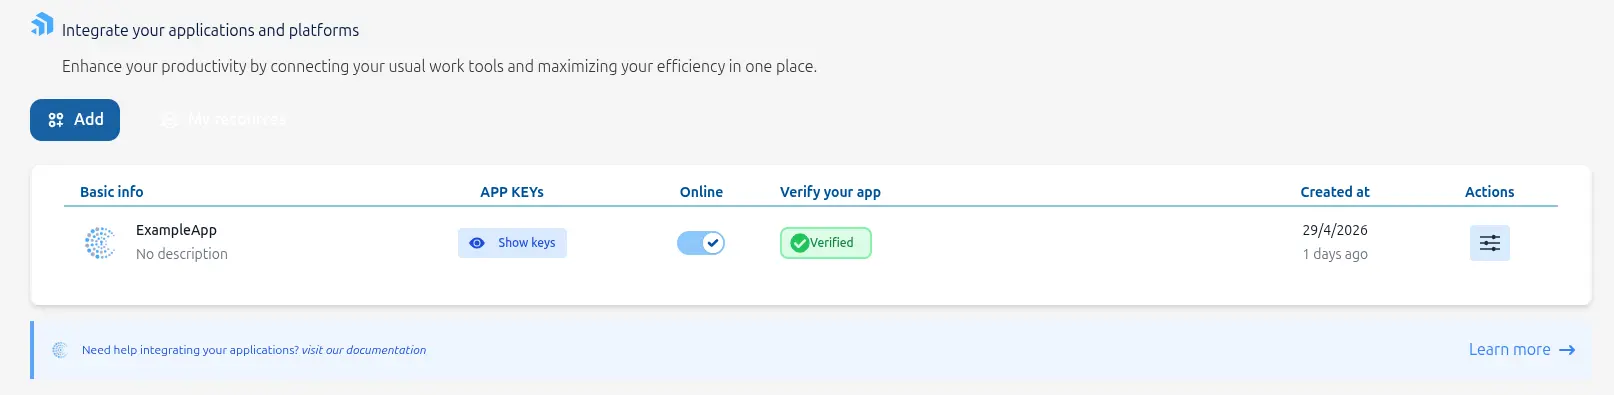
2.5 Retrieve Application Keys
Once your application is linked and validated, you can access your integration credentials. Locate your application in the list and click on the "Show keys" icon to reveal its unique credentials.Clicking the icon will open a modal displaying your unique API Key and Secret:
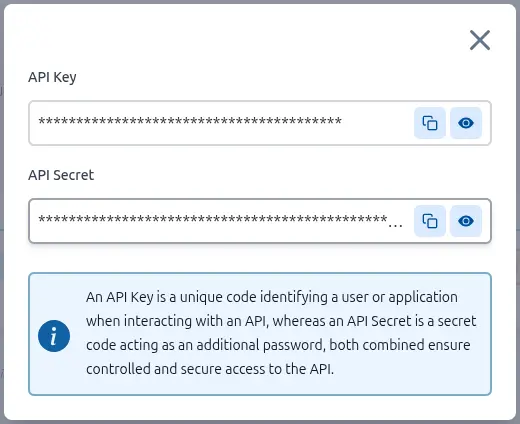
These credentials (API Key and Secret) are essential for configuring the Block-Auth SDK in the following steps.
3. Set up Blockauth SDK
Now that your environment is configured and your application is linked, it's time to integrate the SDK into your project. Follow our dedicated guide to install the library and implement the authentication components in your code.